Greetings, Friends!
Thanks for coming by. I didn’t really fall off the planet in recent months, but much of my creative energy was funneled into MOB (“Mother of the Bride”) endeavors. While not directly artsyletters-related, maybe you’ll enjoy a peek behind the wedding-planning curtain into some handmade touches crafted for the Big Day.
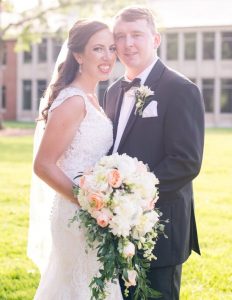
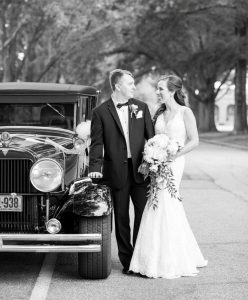
[For REAL wedding photos, you might enjoy photographer Sabrina Fields’s blog post about Morgan and Matt’s wedding, which highlights the happy couple, bridal party, and main events of the day.]
Sabrina Fields Photography (my crop)
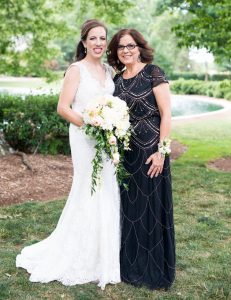
THE BIG DETAILS: Planning started literally the morning after they got engaged – about 10 months from the wedding date. We snagged Greenville, SC venues (Daniel Chapel at Furman University and The Commerce Club) and began lining up special vendors – flowers, DJ, cake, and the like. Because it was out of town (Morgan remained in Greenville for two years after college but just moved to Georgia this month), we also reserved a large room block at The Hyatt Regency downtown. That happens to be where my hubby and I, as Furman students, had our very first date in the hotel restaurant!
Back to the wedding. “The dress” was found Halloween weekend in Charlotte (it takes months for wedding dresses to come in, and a few weeks should be allowed for alterations), with bridesmaids dresses ordered and tuxes picked out soon thereafter.
Then the FUN, SMALLER parts! First, we pretty much had a theme and color scheme handed to us – when the bride’s last name is Black and the groom’s last name is Whyte, the direction is obvious! So, black and white and silver and gray it was, with dashes of fresh color in the gorgeous flowers by Dahlia.
Here are a few examples of things we did ourselves, for your amusement or inspiration.
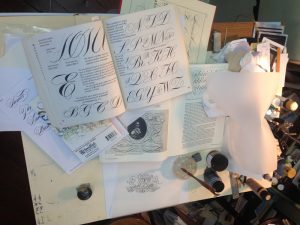
While we ordered wedding stationery in a pattern of silvery-gray lace from Wedding Paper Divas (to complement the beautiful lace of Morgan’s Kenneth Winston dress from NY Bride and Groom), I was determined to brush up on Copperplate calligraphy and hand address each envelope. I hadn’t attempted pointed pen calligraphy since those Furman days in art class…. I thought this would take a few days. It took longer.

First I had to freshen up supplies, thanks to John Neal Bookseller, and drag out my old resources and references and purchase more. I finally learned how to use an oblique pen holder! Copperplate lettering requires a different, and much slower, approach than broad-nib calligraphy – and a pressure/release technique that’s a little tricky. Don’t look too closely at the chicken-scratch above; initial efforts were NOT pretty.
Finally the calendar dictated that I get those 125 envelopes (outer and inner!) addressed, ready or not. I can’t believe I don’t have pictures of how they took over our dining room and spilled onto living room shelves; I accidentally deleted a couple I snapped on my phone. But a few recipients were kind enough to send texts with nice notes and photos when their invitations arrived in the mail – here’s a sampling of those envelopes.
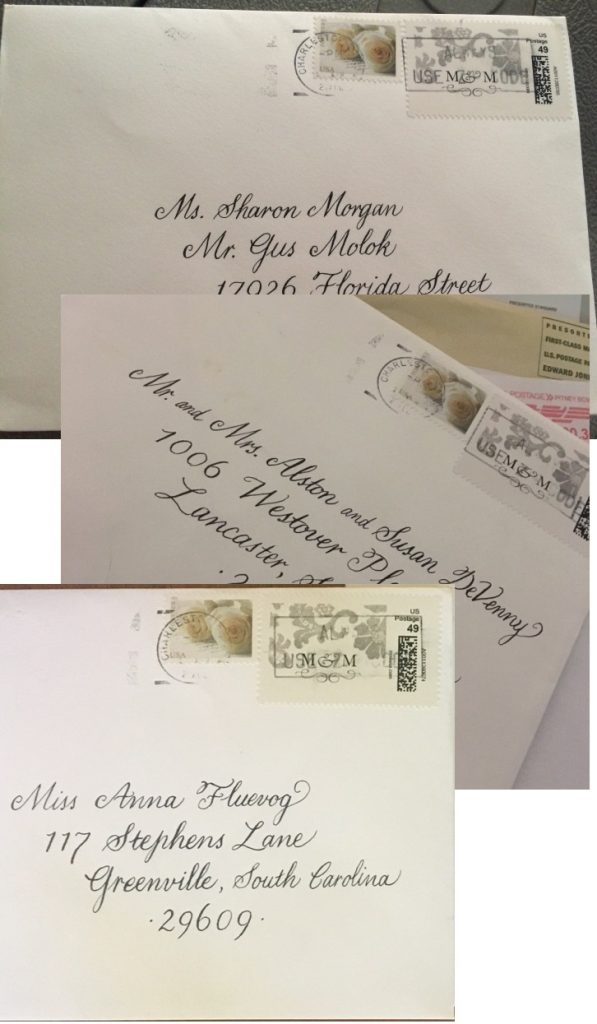
Far from perfect, but fun to do and sent with love. Oh – see the extra stamp required on each envelope up there? Just .1 ounce (POINT 1!) above one ounce, with the RSVP inserts and such, so each envelope required an extra stamp. I wanted a wedding-friendly image in addition to the custom postage we’d ordered, so another first-class stamp it was.
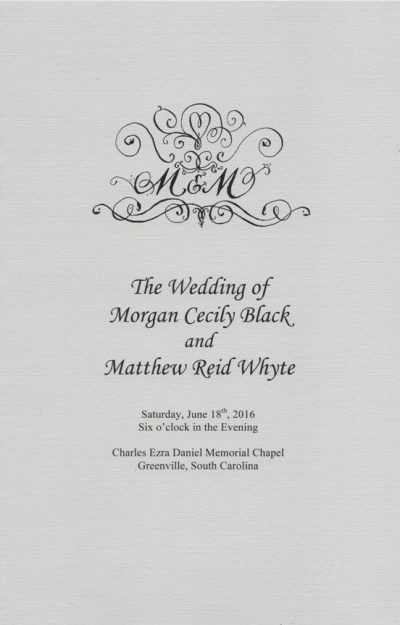
While in a calligraphy vein, I also wanted to add a wee flourish to the ceremony programs with an “M & M” decoration, since we were employing the letters here and there. We had looked at ordering matching programs from Wedding Paper Divas, but the cost was beyond the budget we’d already exceeded for all of that fancy paper. My hometown printer here in Beaufort, Murr Printing, saved the day with a simple folded program on a lovely light gray linen cardstock. For the ornamentation, once again, practice:
then the final result – nowhere near perfect, but a scroll-y, curlicue touch:
Because most attendees were traveling, we made up welcome/goodie bags (one per room) to be handed to our folks at check-in. I ordered bulk quantities of designs that I could also use for my shop! (These came from Store Supply Warehouse.)
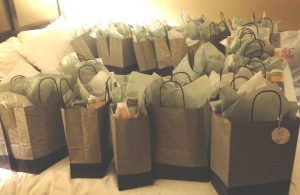
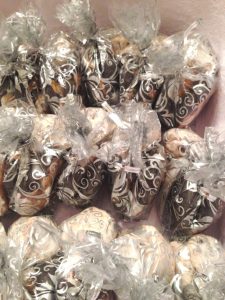
Each featured a circle tag from Wedding Paper Divas attached with a silver ribbon. 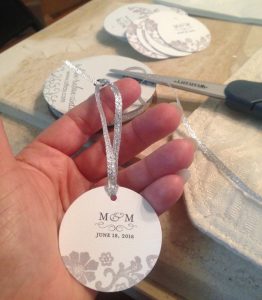 Inside were: A printed weekend itinerary (with a couple of more inclusive get-together options beyond wedding party events), a map, a new colorful guide to Greenville, a guide to the Swamp Rabbit Trail for those needing a fitness break, chamomile tea, some festive napkins, a little bag of silver Hershey Kisses & Hugs, and – of course – another bag with those yummy bakery black and white cookies, plus a few Keebler Danish Wedding Cookies thrown in for good measure.
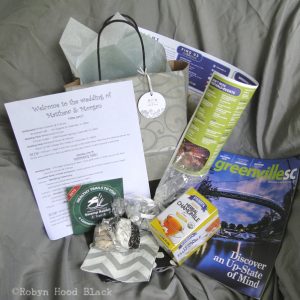
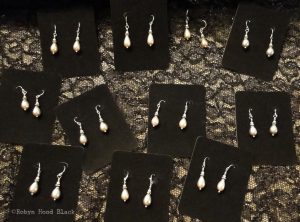
The most special thing I made for the wedding were earrings for the bridesmaids. Morgan and I had been looking at options on Etsy (where her lovely earrings came from – who could resist a shop with a name like Poetry Bridal?), but couldn’t find exactly what she wanted. When I realized she was drawn to simple designs – no stone setting or metalsmithing! – I knew I wanted to have a go. I love each one of those lovely young women who stood with Morgan and wanted to give them a little gift myself.
I’d found the Avon necklace I wore at my own wedding, um, 32 years ago. The gold-tone was definitely more tone than gold, and the iridescence uneven on the little pearl beads. But I knew I could use those small beads in earrings. I found some lovely 1940s Japanese glass beads (also “cheap” but with such a pretty patina) from another Etsy shop, House of Twinkle. Perfect color to complement the dove gray dresses. 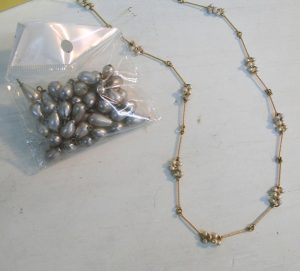 Then it was time to experiment, trying a couple of different styles of rondelle beads from The Paris Carousel, adding a tiny 100-year-old steel bead from ohmymilky to each, and dangling all from findings from UnkamenSupplies. (Yep – all Etsy.)
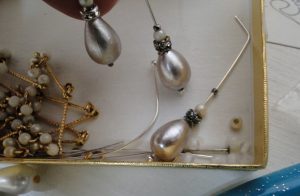
Here’s how they turned out:
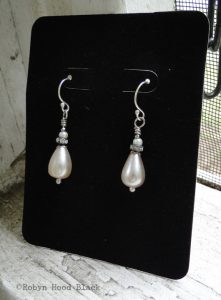 (I made Morgan and myself a pair too, just for fun!)

Sabrina Fields
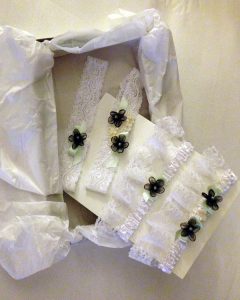
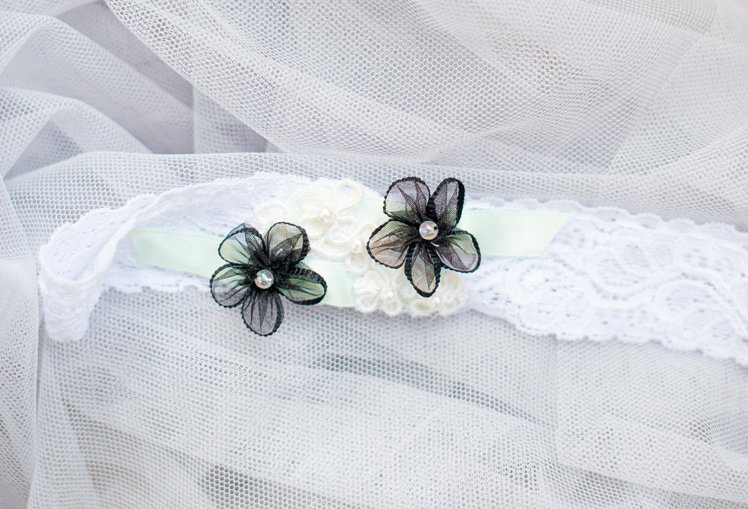
I certainly come by my “maker” tendencies naturally. My mother, Nita, made Morgan’s garters (one to keep and one to throw). For the keepsake one, she used a little snip of lace from my wedding dress (taken unobtrusively) – a dress that SHE had made ME all those years ago. For Morgan, she even made a couple of sets to choose from:
Sabrina Fields
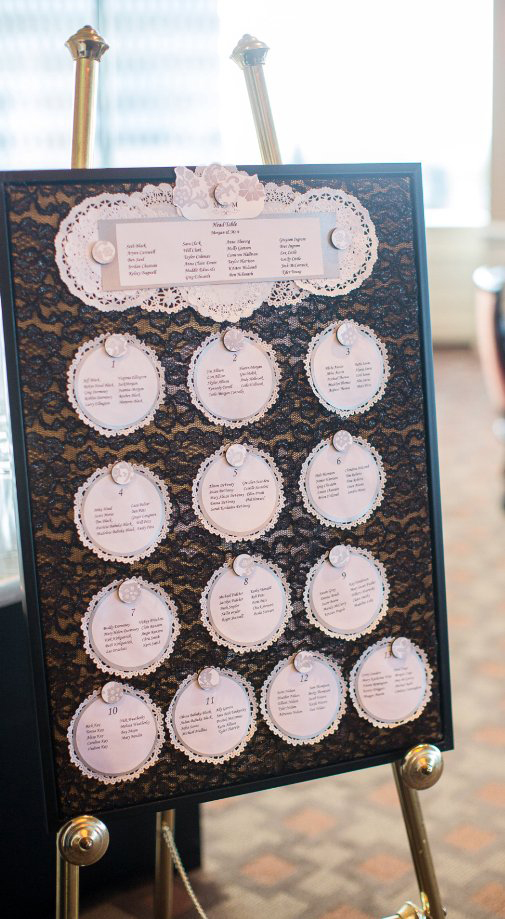
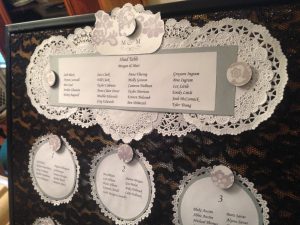
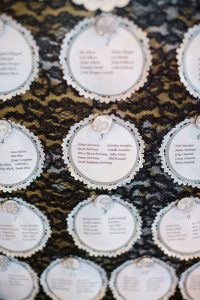
Speaking of lace, I wanted to incorporate it somehow into the seating chart for the reception. Be forewarned – making a seating chart (even if just to assign table numbers as we did) is not for the faint of heart! It’s like putting together a big puzzle, assuring that guests will at least have someone they know at their table. :0)
After figuring out all those rounds of ten, the fun can begin. I started with a 20 X 30 framed magnetic board from our local T.J. Maxx. I covered the canvas surface with black lace fabric I ordered on eBay from paylessfabric, tucking and gluing the edges inside the frame. Also on eBay, I found some great paper doilies from Sea Starr Emporium. I grabbed some metallic silver cardstock from my studio and with my new favorite tool, an EK circle cutter, cut out circles slightly smaller than the doilies. Are you still with me? I printed off the names for each table on good white paper and cut circles of these as well (slightly smaller than the silver circles), experimenting…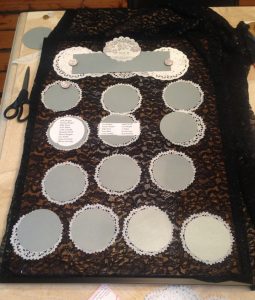
At the top, I used a rectangle for the bridal party’s head table, playing with layers of doilies behind that and accenting with a cut out lace design from an extra wedding invitation.
In a final burst of overkill, I covered magnets with lace designs from the invitation, too – another excuse to play with the circle-cutter. I glued the layers of the circle together, then used a magnet to hold each “table” to the board.
Here’s how it turned out:
Sabrina Fields Photography
Sabrina Fields Photography
[And the bride and groom get some fun refrigerator magnets to remind them of their celebration.]
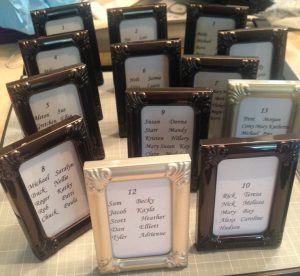
For good measure, I also printed out the names for each table and put them in small frames. First names only – to encourage conversation, and so they’d fit!
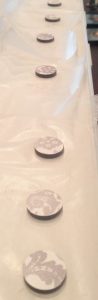
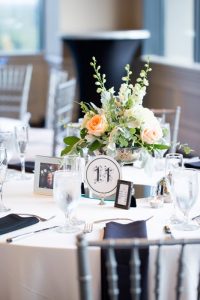
These were placed with the round table numbers (ordered on eBay from Green Ridge Designs, along with tiny stands) – see below. I ordered two sets so the numbers would be visible from each side.
Sabrina Fields Photography
Morgan also made a darling sign with their “hashtag” – one of several new wedding norms that didn’t exist back when I got married!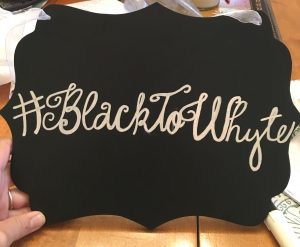
Also, in addition to a traditional guestbook, Morgan and Matt bought a new bible and set it our for guests to highlight their favorite verse and sign. We supplied small not-too-sticky sticky notes for them to mark the spot so they could be found later.
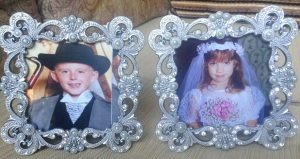
One last note about reception decor – For each table, I framed a 5 X 7-ish picture of Morgan and Matt through the years. (These went back to eighth grade, though the two didn’t really stick as a couple until their senior year of high school!) And for the head table, these found treasures from the past, placed in T.J. Maxx frames, marked their seats:
These days, couples often make their grand exit through sparklers (rather than bird seed, or, in the even older days, rice.) We found good ones at a good price from Wedding Sparklers Outlet. (I ordered the 20-inch sparklers rather than the 30-inch, after another recent family wedding involved 30-inch sparklers and quite a little light show as the bride and groom made their escape exit…)
And one more wedding vendor – I don’t yet have pictures of it in action, but to keep our swanky affair grounded, we arranged a surprise gift for the bride and groom in the form of a custom monogrammed cornhole set! Etsy sellers Zubky added some floor-protection to the bottom, and the Commerce Club staff kindly set it up in the bar area. It was a hit with the younger guests, for sure, and we hope will foster fun for years to come.
Finally – favors! We offered a couple. Morgan found some great Koozies from Rook Design Co. on Etsy: 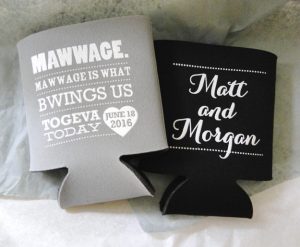 Yes – members of our immediate and extended family can quote every line of “The Princess Bride” movie.
And, because we HAD to…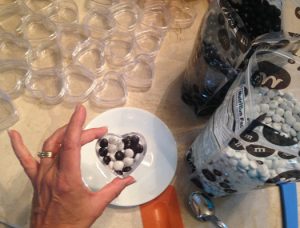
Black and white M&Ms! Kind of pricey but we had no choice. (At least we didn’t need any custom printing – the M’s were just right.) I drafted hubby Jeff and son Seth to help with the assembly. 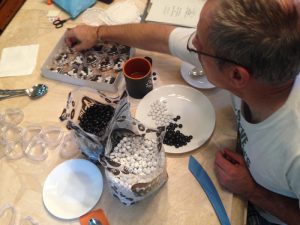
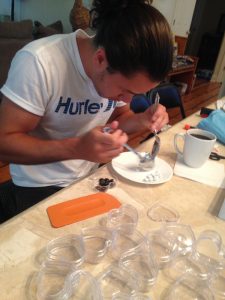

The plastic hearts (perfect to hold a couple dozen candies) came from Papermart. I also ordered some of their ribbon and was pleased with the quality!
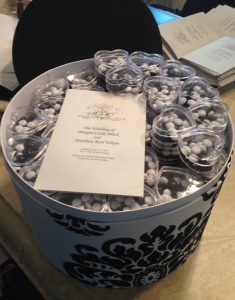 We hope everyone, the bride and groom most of all, left with full hearts. (Sorry – couldn’t help myself.)
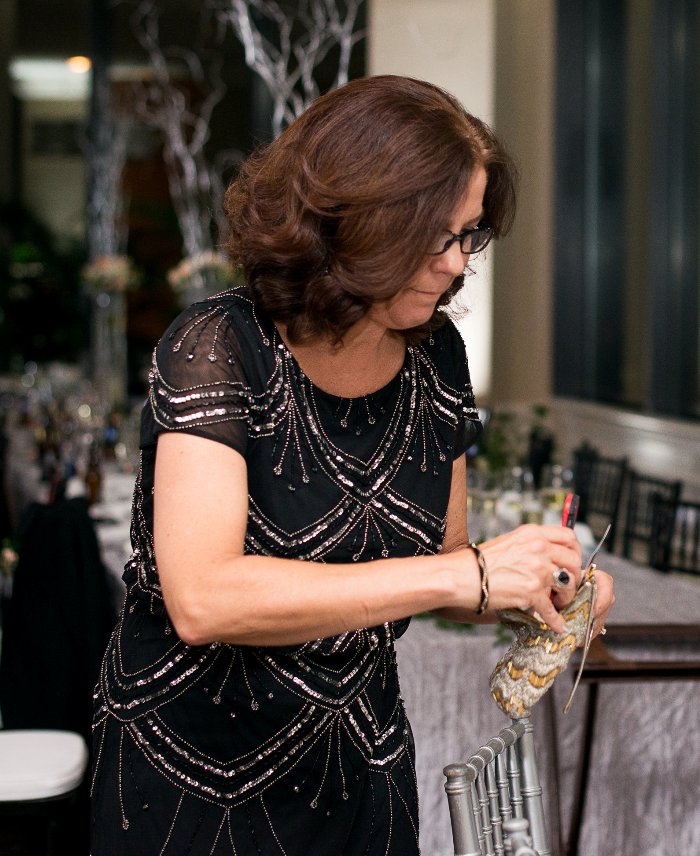
When we get family pictures back, I’ll follow up with a much shorter peek into how I used some vintage Etsy finds to decorate myself for the big day.
And I promise to post more artsyletters art soon, now that the flower petals have settled and I can get back into the studio…
Happy July! And if you’re planning a wedding, best wishes!

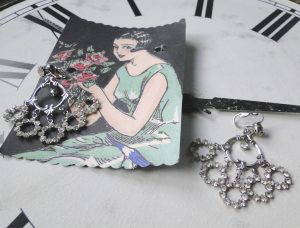 I love them! Plus, shop owner Michele sent the loveliest note with them, tucking in good wishes for the wedding, and they were beautifully packaged with extra TLC (& such a fun vintage image-inspired display card). They were on sale, too, but a sparkly splurge at around $68.
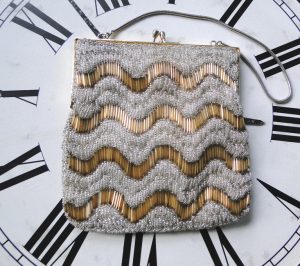 “Beautiful, sparkly 1920’s beaded evening purse…it’s a combination of silver beads with long gold beads laid in a wave..has a pretty clasp with faux diamonds (I hope they’re not real!) and a pretty coiled silver tone handle.”
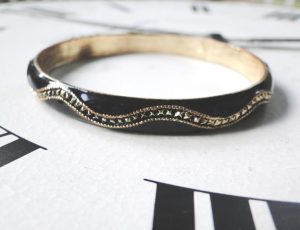 Shows its age a little but just the right touch. And just $14.99! Shop owner Lisa Rae took great care in fun packaging and sent a thoughtful note.
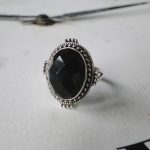 It was in an Art Deco setting I couldn’t resist.And reasonably priced for such careful hand crafting.